Introduction to SKYBIZ Site Device or Coordinate
In a decentralized workforce management system, assigning specific site devices or geographical coordinates to employees is a critical operation handled by supervisors to ensure precise, location-validated attendance tracking. Rather than relying on a static check-in method, this framework allows field supervisors to link an employee’s profile to an authorized corporate hardware asset (such as a specific site tablet or a biometric device ID) or bind them to precise Global Positioning System (GPS) coordinates with a predefined geofencing radius. This flexible administrative control ensures that remote field engineers, construction crews, or multi-branch staff can only clock in and out when they are physically present at their assigned operational zones or utilizing a verified on-site terminal. By delegating this micro-management task directly to supervisors—who possess real-time knowledge of rotating project sites and shifting team deployments—the system successfully thwarts fraudulent “buddy punching” and tracking discrepancies, delivering highly accurate geographical logs directly into the centralized payroll and HR engine.
How to assign a site coordinate to employees?
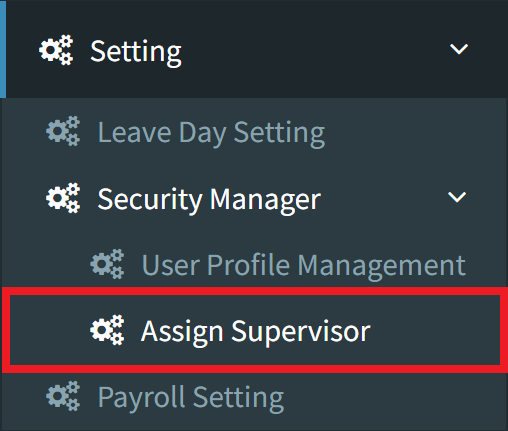
Step 1: To assign a site coordinate to employees, navigate to Settings > Security Manager > Assign Supervisor.
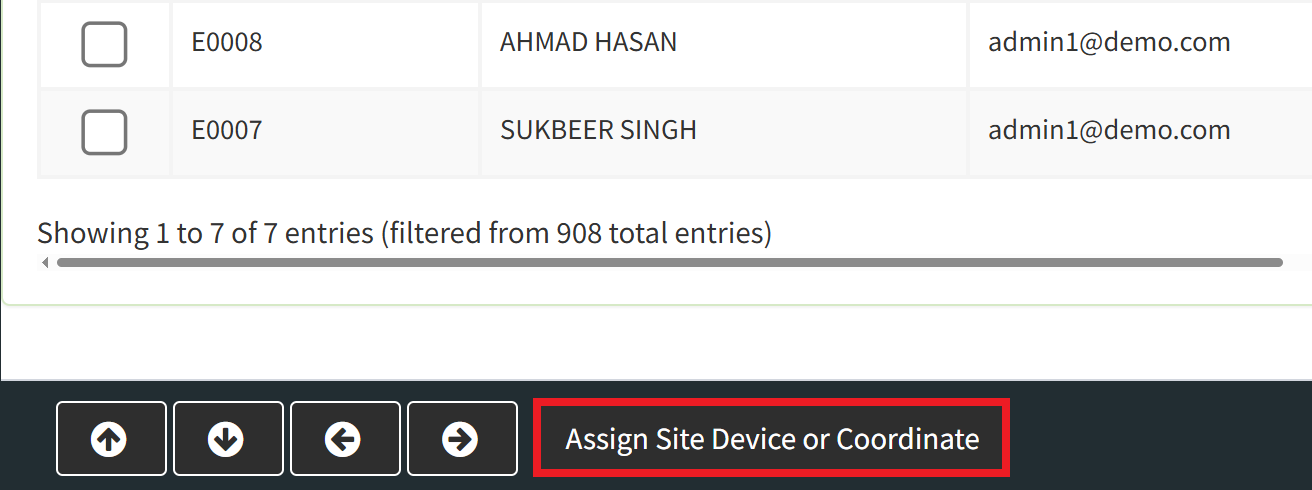
Step 2: Click the Assign Site Device or Coordinate button on the bottom left
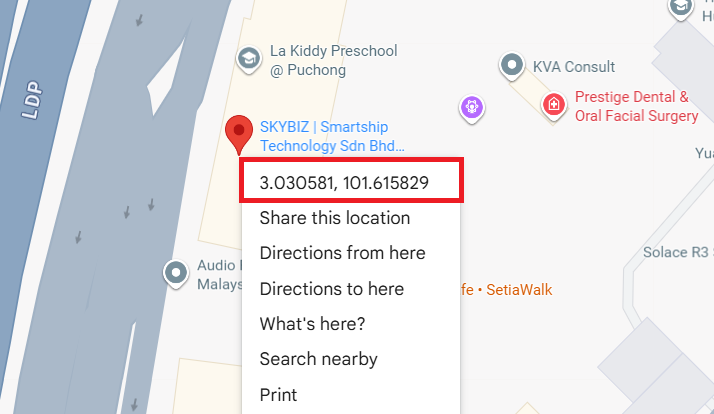
Step 3: Open Google Maps and search for the company or warehouse location. Right-click on the map marker and click on the latitude/longitude coordinates to copy them.
Step 4: Check the Site Coordinate checkbox, then paste the copied latitude/longitude coordinates into the Site Coordinate input field. Make sure to change the separator from “,” with “;”
From:
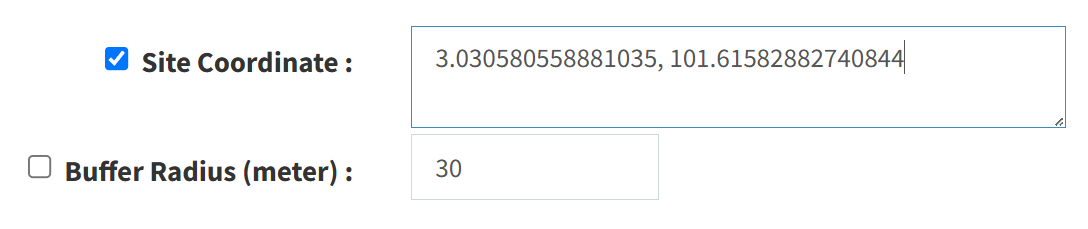
To:
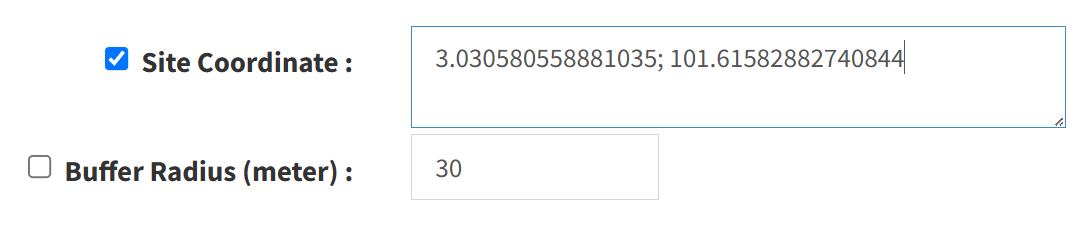
Step 5: Repeat these steps if your company or warehouse has multiple addresses. This allows employees to clock in (record attendance) at multiple locations. Ensure you input only one location per line.
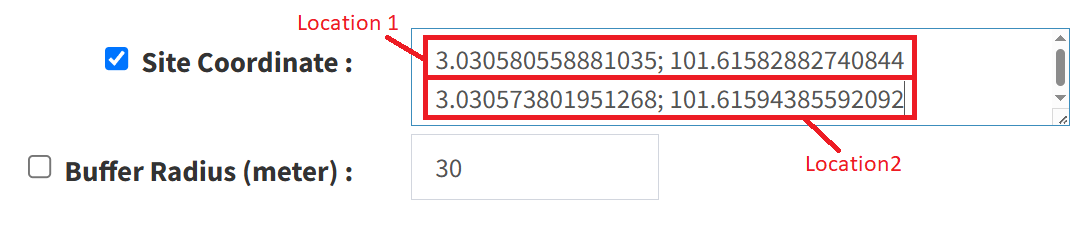
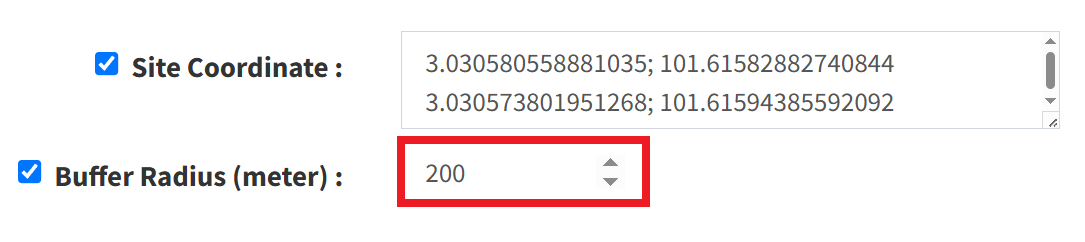
Step 6: The default geofence radius is set to 30 meters. If your warehouse or site covers a larger area, check the Buffer Radius (meter) box to customize the allowed range. Employees will only be permitted to clock in when they are inside this designated perimeter.
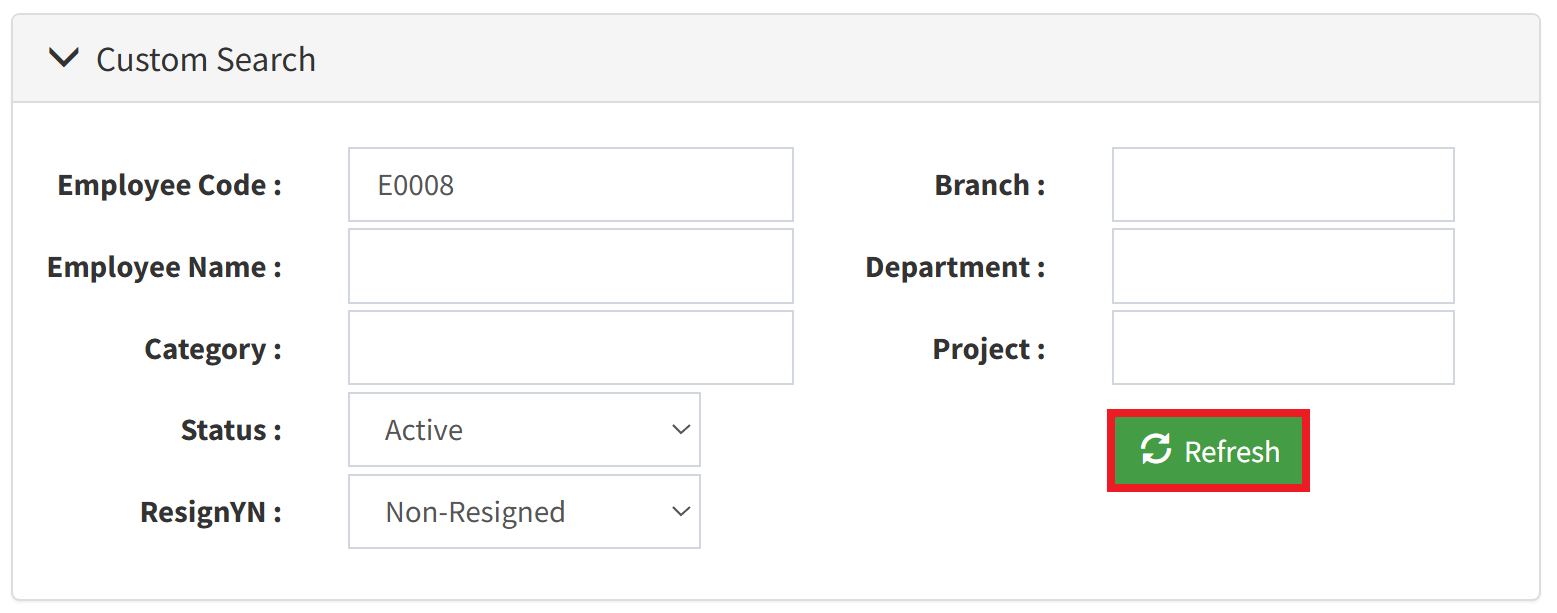
Step 6: Click the Custom Search tab to filter the employee listing. After defining your filter values, click the Refresh button to update the list.
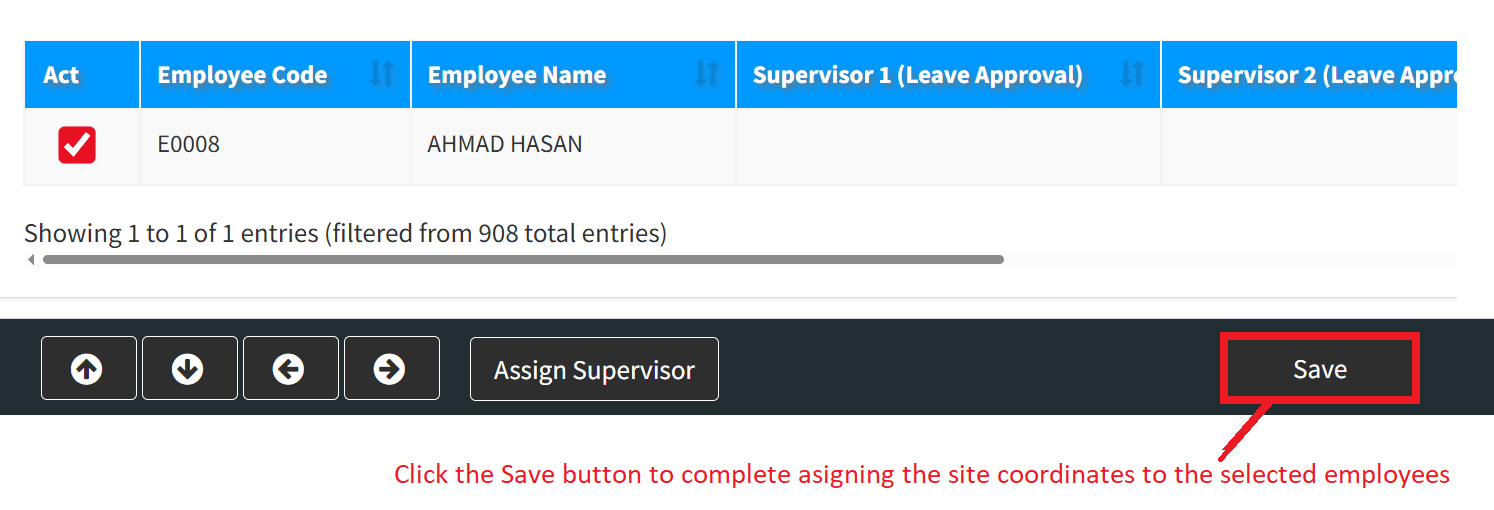
Step 7: Select the target employees and click Save to complete assigning the site coordinates to them.
Conclusion
In conclusion, empowering supervisors to dynamically assign site devices and spatial coordinates provides organizations with the agility required to manage a modern, mobile workforce with absolute precision. This mechanism bridges the gap between fluid field operations and rigid corporate governance, ensuring that attendance data is inherently trusted and verified at the source. By decentralizing this configuration layout to localized managers, businesses eliminate administrative bottlenecks at the core HR level while maintaining strict operational discipline across all external job sites. Ultimately, embedding device and coordinate mapping into supervisor workflows safeguards payroll integrity, optimizes resource scheduling, and builds a transparent, highly accountable tracking ecosystem.
Powered By: SKYBIZ ®